
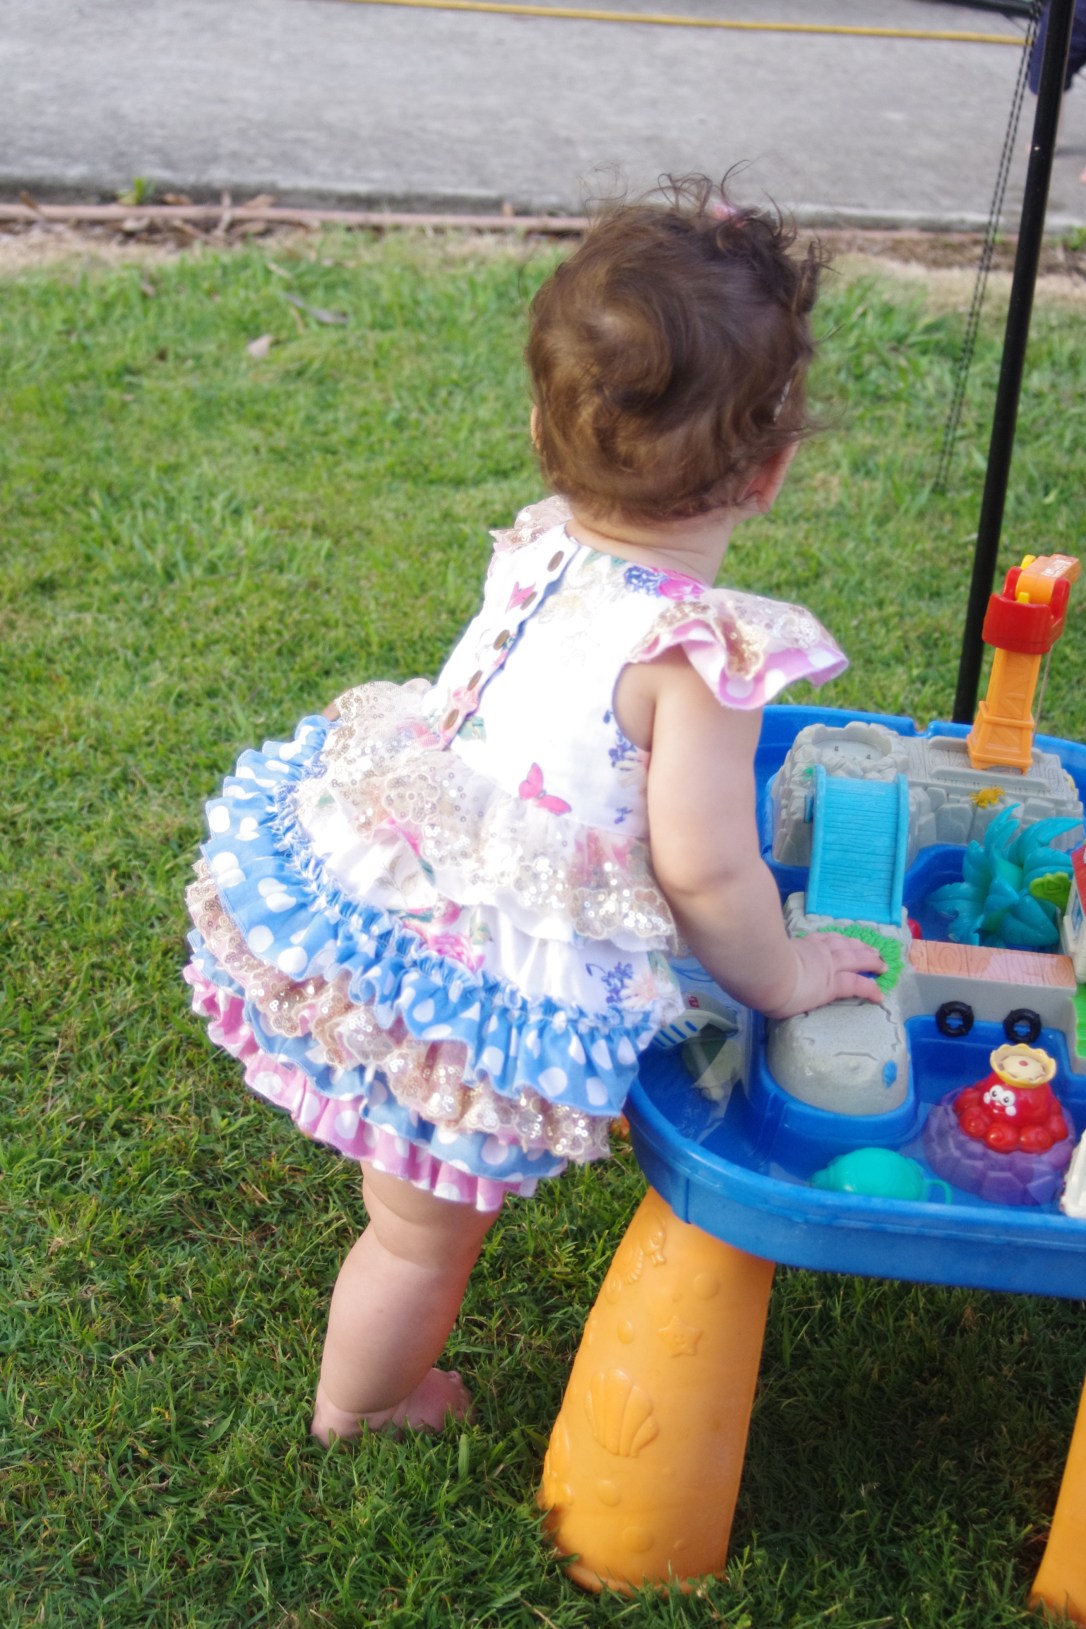
I had so much fun adding ruffles to my baby girl’s 1st birthday romper, I thought I’d share. This romper was the Baby Tea Party by Tadah patterns, I’ve also used the same method to add ruffles to the Melbourne Romper by Jilly Atlanta (featured in One Thimble). Both are size 0/ 9-12 months. The gorgeous fabric is from Utopian Threads Online Fabric.

I use a lot of the tips and tricks that can be found in the Nappy Cover/ Ruffle bum pattern by Tadah. If you need more information than what I put in here, that’s a great place to go (of course there may be others but this is one I know of).
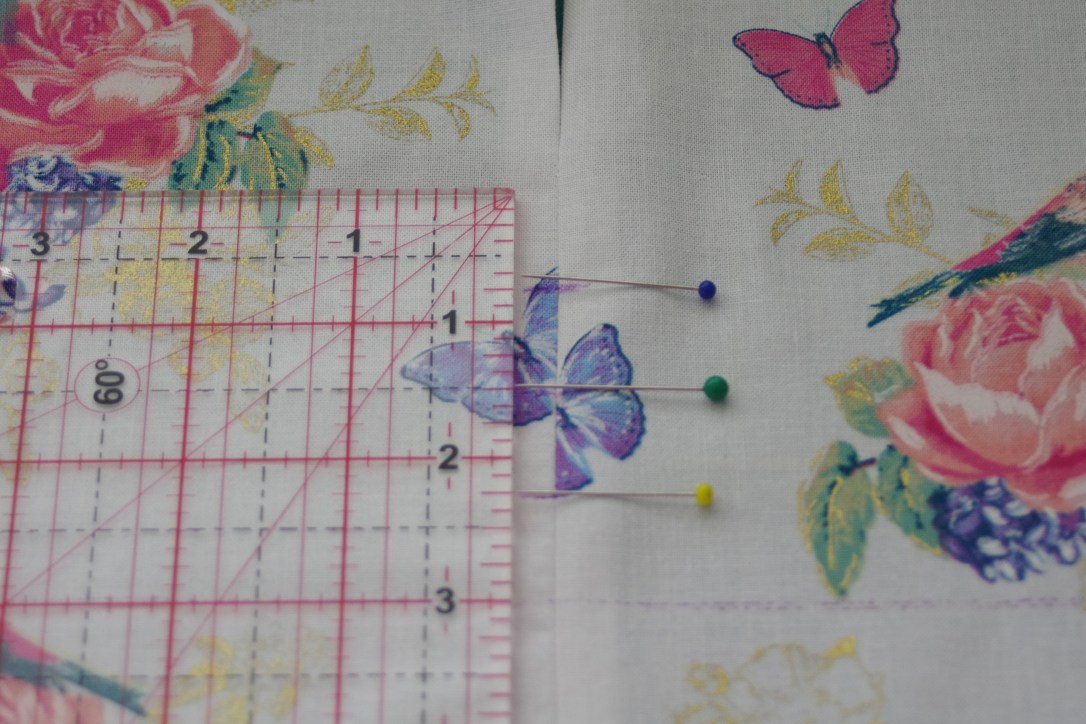
- I cut my strips for my ruffles using the width of the fabric, and use approximately a 2x ruffle factor. So that I can fit 4 rows of ruffles, I cut them at 1 1/2 inches each. I love my rolled hem function on my overlocker and use this to finish the top and bottom of my ruffles. If you don’t have this function or a rolled hem foot on your machine and need to do a narrow hem, add another 1/4 inch or so to the width of the strips.
- As far as the pattern goes, I mix up the order a little bit. I like to have the ruffles done before constructing the rest of the pattern, so this means joining the back panel pieces. If doing the Tea Party, make sure you don’t attach all the way (check your pattern to see the details).
- Once the back is sewn together and pressed, I can make markings for the ruffle placement. to get them as close to the ‘bum’ as you can, I measure up from the leg the amount I’ll need for the seam. For example, a 1cm seam allowance you need to measure 2 cm: 1cm for the seam and another 1 for where you stitch. This is approximately where the bottom of the first ruffle will sit.
- Now I can make the markings for where the sew line of the ruffles will be. I use the original width of the ruffle pieces ( 1 1/2 inches) and draw lines across the back for the first ruffle. The rest of the ruffles are divided by how much room I have. This playsuit, they are 3/4 inch apart, using 4 ruffles. The Melbourne romper, you can see, they are slightly further apart, as I had 3 ruffles and a larger area.
- The fun part, attaching the ruffles! I have a ruffler foot. Although it is quicker, I go slowly so that I make sure they stay lined up. If you don’t have a foot, make your gathering stitch about 1 cm from the edge of your ruffle pieces before attaching. In the suit I made for my daughter for her birthday, the ruffle with the sequin lace is hand-gathered using a long stitch and loose tension. I used the lace and the cotton ruffle as 1 ruffle together.
- Now I make the rest of the suit as per the instructions. The flutters have been altered by making the widest part the same width as the sequin lace then following a curve to the end. I finished the edge with a rolled hem. When I added the lace, I made the outside edge follow the edge of the flutter. I pleated the inside part of the lace and pinned it to the flutter before doing the gathering as per the instruction.
- When I attach the bodice to the romper bottom, I have added a strip of fabric the same width of my sequin lace the same way I would the skirt and romper option. It is finished at the back the same way the skirt would. The strip of fabric has a rolled hem also. When I joined all the pieces, there was 3 layer to the bottom, the romper section, the strip and the lace.

Altering the flutters and the ‘skirt’ for the sequin trim.
This is how I made this romper. I hope it’s inspired you to create your own or play with different techniques from other patterns. Be sure to show me what you create
*Melbourne Romper – I cut the ruffles the same way as above, however, they are wider. They are 2 inches wide instead of 1 1/2 inches. -I measure the first ruffle from the top of the back pieces. I measure down 3 inches for the first ruffle then 1 1/2 inches each for the next 2.
Happy sewing,
Martina 🙂

