

This week I made my nephew a present for his first birthday, a critter balloon ball. To do this, I mashed 2 patterns together.
The first was the cute ‘Roly Poly Critter Ball’ by Swoodson Says. It’s also available in One Thimble, Issue 11, which is where I got my copy from. I made him the gorgeous Panda. The tutorial is based on this but you can use the technique for any of the critters. The other pattern I used was for the Balloon Ball which forms part of the ‘Baby’s First Toys’ pattern collection by Flosstyle Patterns.
Which pattern to use for the ball: When I looked at the differences in the 2 patterns, which are both essentially balls, there was 1 main difference that determined which I’d use for the ‘ball’ part. The Flosstyle balloon ball was bigger and designed to hold an inflated balloon, so rather than just use the techniques from the balloon ball with the Critter ball, I decided to use this template. When constructing the ball, I used the instructions from the balloon ball pattern, including the seam allowance.
Calculating scale: After making this decision, I calculated that the balloon ball was 130% bigger than the critter ball. I had to apply 130% to the following areas:
- When printing the pages with the face pattern pieces from the Critter ball pattern. When printing at 130%, you also need to choose ‘Poster Print’ to ensure that all the parts are printed.
- The measurement to show the positioning of the facial features on the ball.
- The size of the eyes and nose.
Materials to use: The balloon ball needed to be more lightweight than what was used in the Roly Poly Critter ball. I chose to use quilting cotton for the main ball, quilting cotton for the large eye patches and ears, felt for the eyes and nose, rather than those designed for stuffed toys, and a fabric pen for the mouth. You could use a poplin or other lighter woven. You could also use the woven for the eyes and nose, attached the same way as the eye patches and ears.
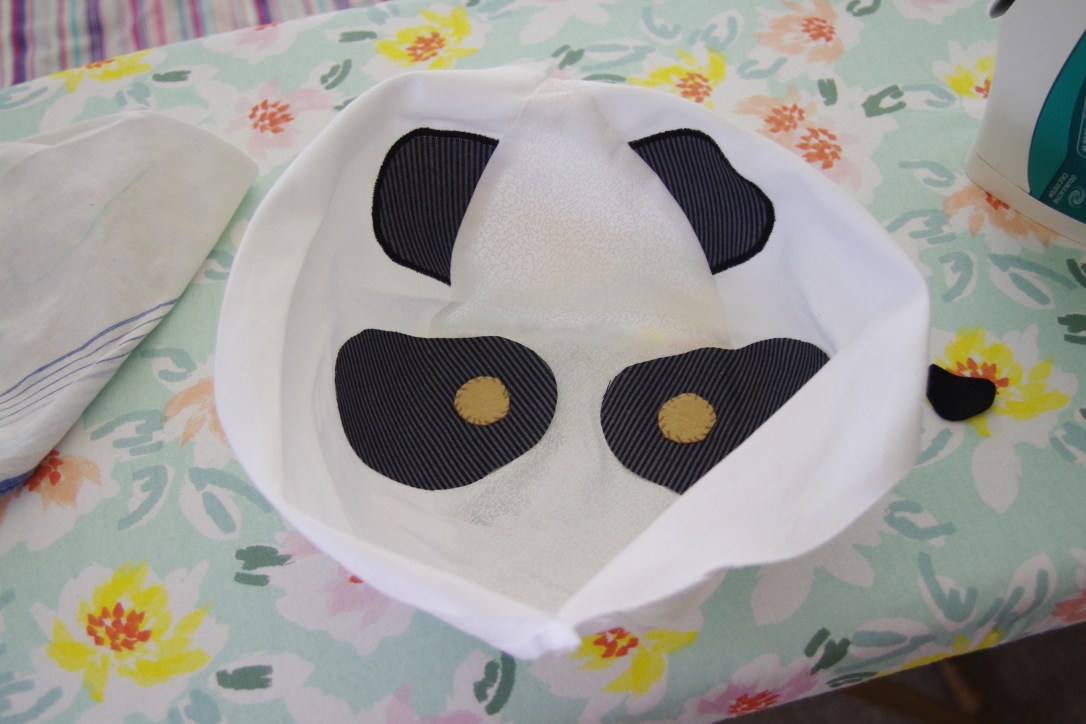
Attaching the facial features: I needed to attach the eyes to the eye patches before they were attached to the ball (if making one of the other animals, remember to attach the eyes before sewing the 2 halves of the ball together). I hand stitched these on but you could machine stitch.

I then attached the facial features using ‘Heat and Bond Light’ (following their instructions) and then sewing a tight zig-zag around the edges, except for the inside ear edge that is hidden within the seam allowance.
When ironing down the eye patches, I needed to invert the 1/2 ball and work slowly so that it would fit neatly. (When ironing over felt: if you have used acrylic felt, do not iron directly over it, it will melt. If ironing over wool felt, as it is a natural insulator, you will need to hold the iron for longer than normal)
Completing the ball: The rest of the ball, I constructed using the instructions from the Flosstyle pattern. I put the ‘hole’ for the balloon in the bottom part of the ball.
I was so excited to see the finished product and that I happened to have a white balloon in the cupboard that was perfect for my Panda.
I would love to see your critter balloon balls, please tag me #noblecubs, as well as the fabulous pattern creators #flosstyle #swoodsonsays and #onethimble
Martina 🙂


1 thought on “Critter balloon ball mash”